Abstract Nature - Personal Project 1

Abstract nature - What is abstraction
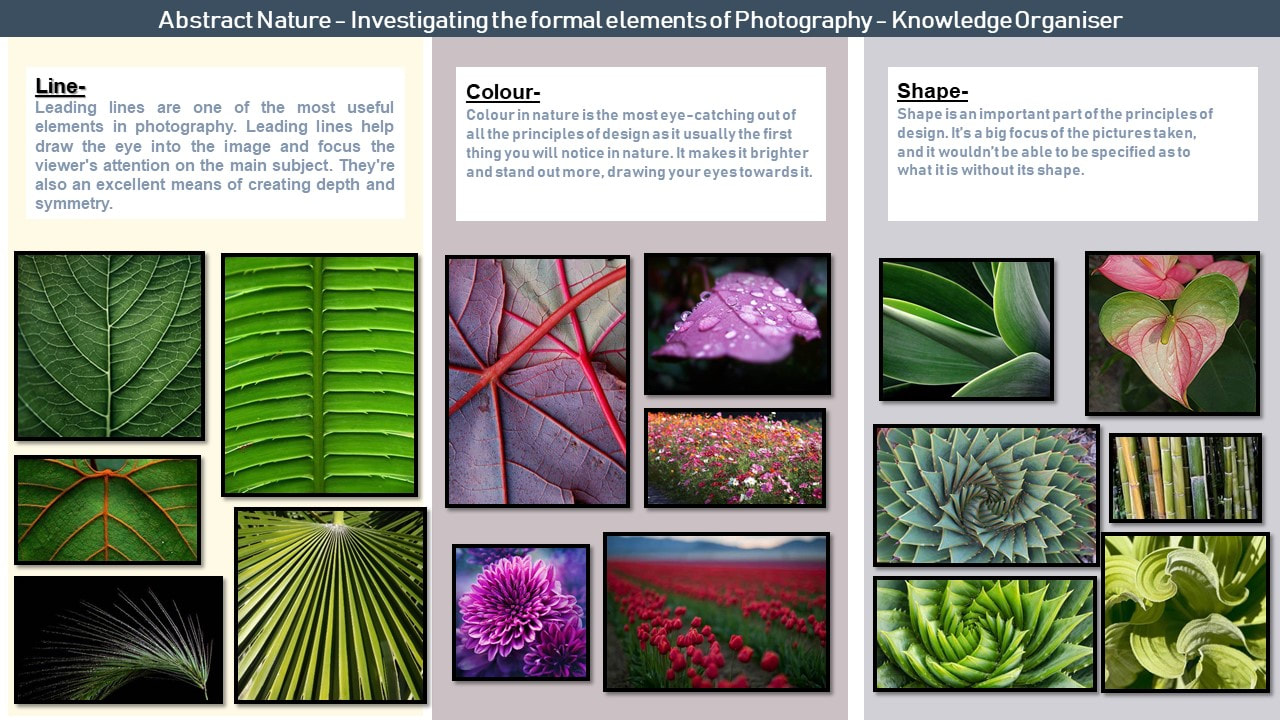
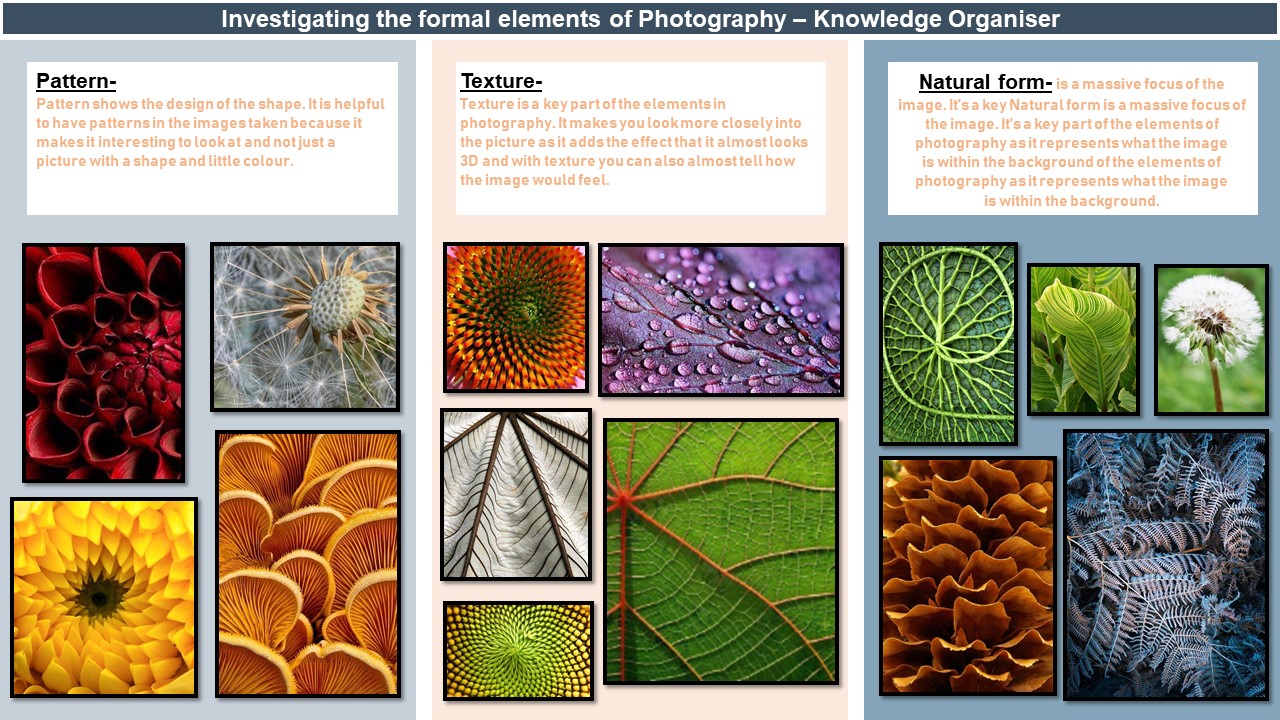
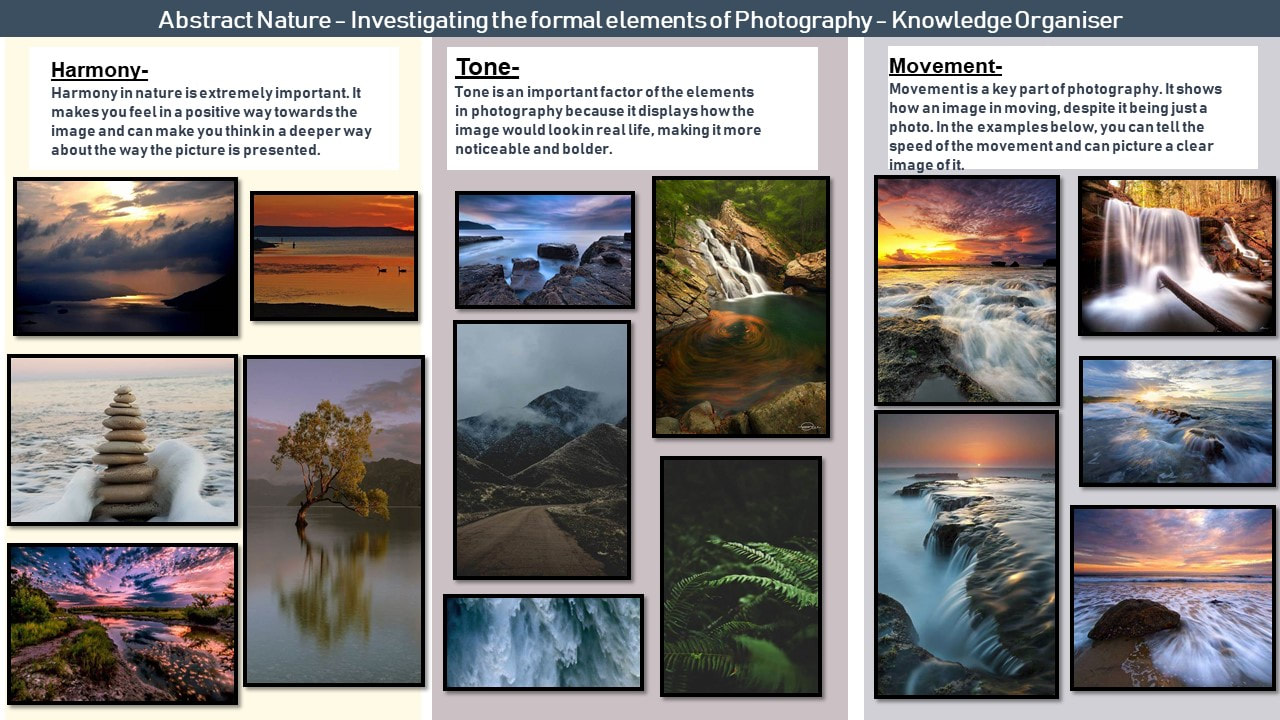
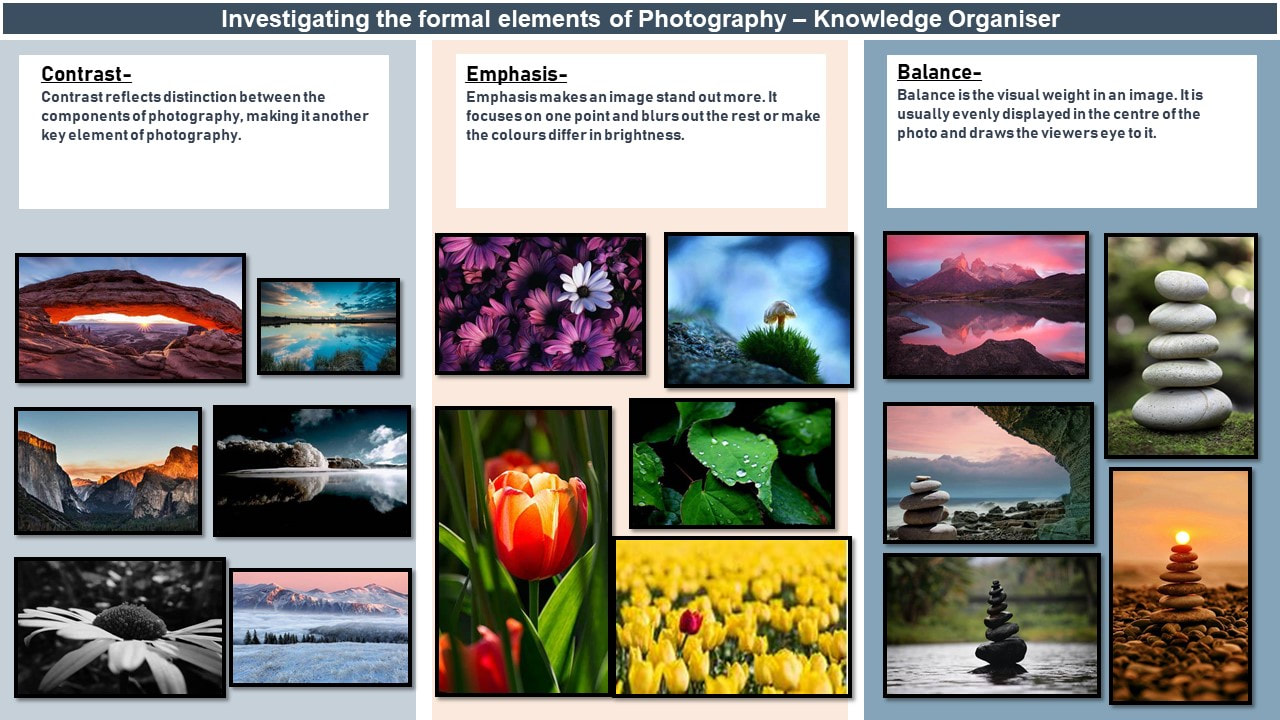
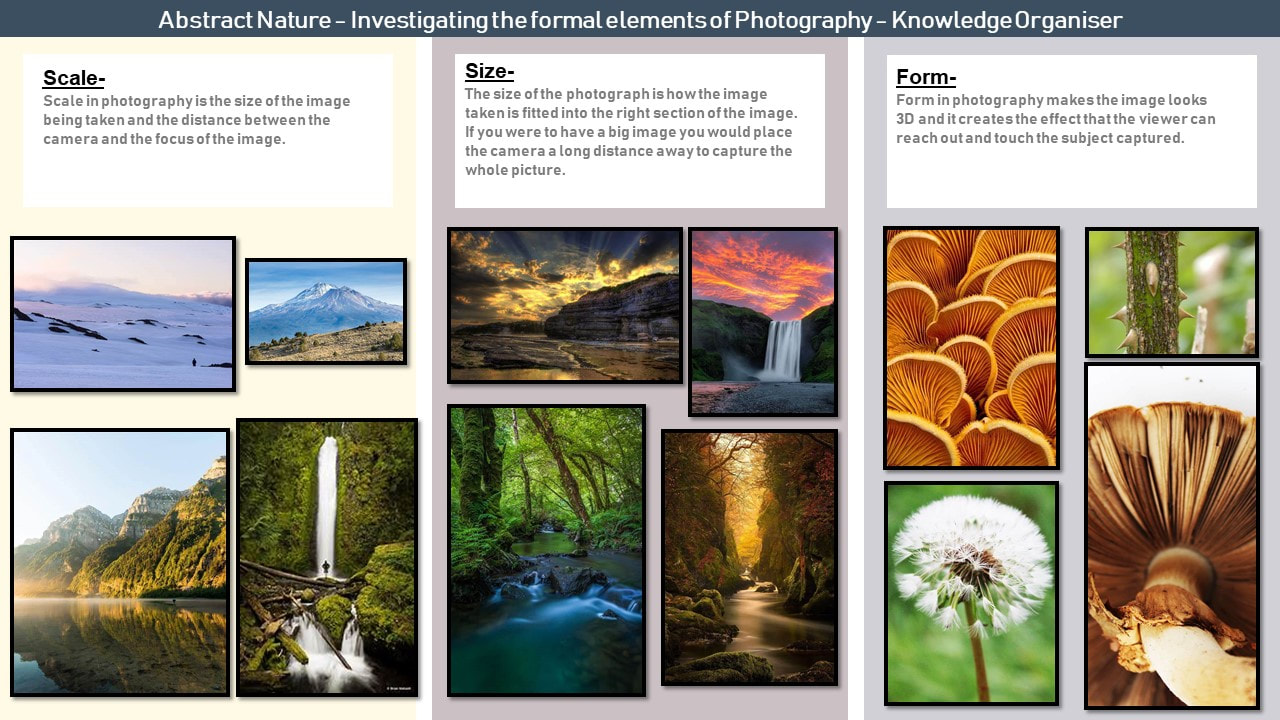
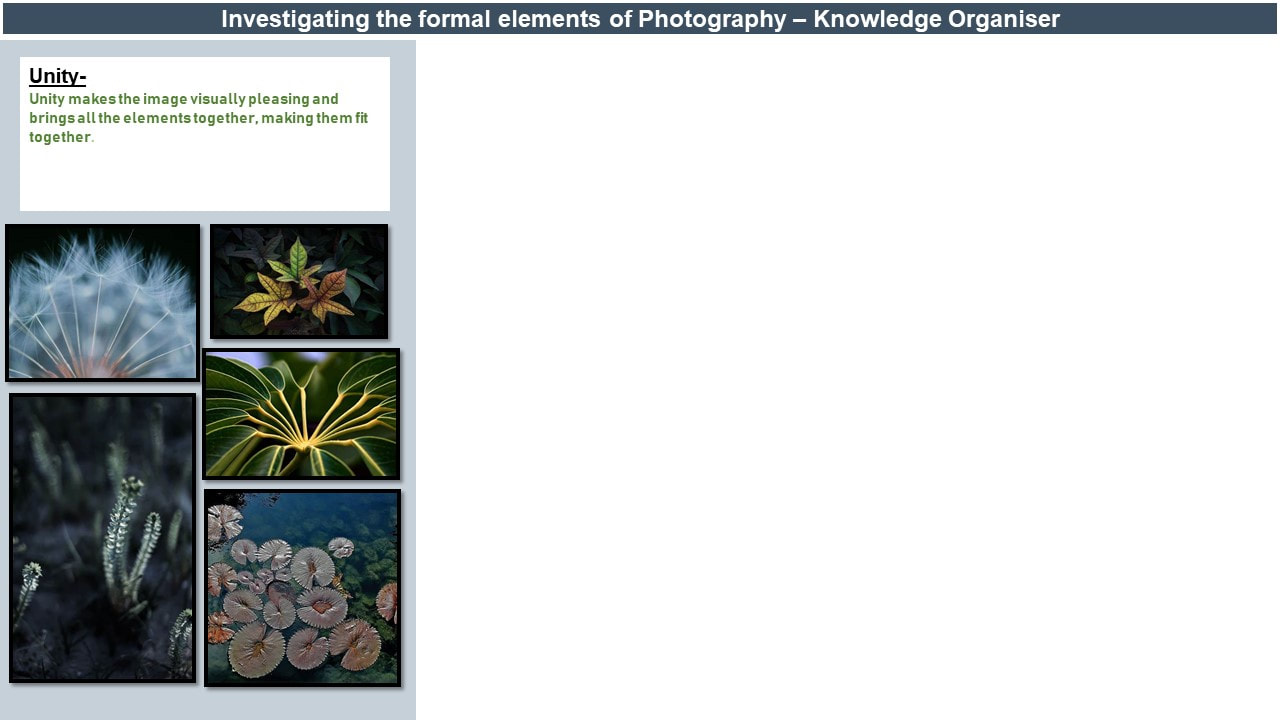
Abstract photography, sometimes called non-objective, experimental or conceptual photography, is a means of depicting a visual image that does not have an immediate association with the object world and that has been created through the use of photographic equipment, processes or materials. A main focus of photography would also be the elements of art and design which are usually all displayed within an image. Below are some examples of examples of abstract photography which I've done research on and displayed with images representing the different elements.


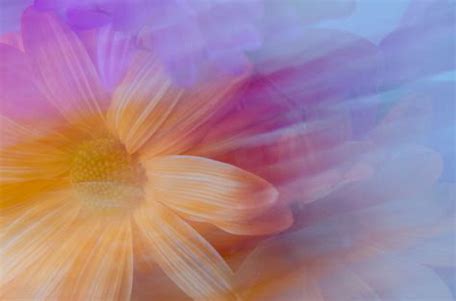
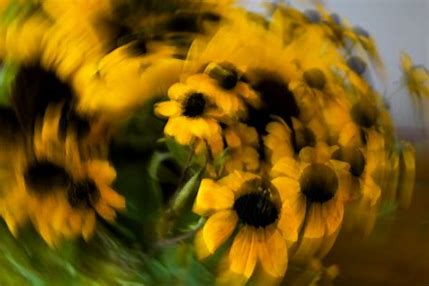
Intentional Camera Movement shoot- ICM-


|
ICM shoot (Intentional Camera Movement)-
For this shoot I used various camera movement techniques such as rotating the camera left and right as the image was taking, creating the image to be slightly blurry. Additionally, I turned the camera in a circular movement, did small shaky movements and moved it in horizontal/ vertical movements to add to the slight shaking motion in some of these images. The equipment used for this shoot was a camera, a plain white background (a3 paper) and various coloured flowers. To enable me to take these intentional camera movement pictures I had to change the settings on the camera to a shutter speed of minimum 1/4, giving it enough time to capture the movement caused by moving the camera. The light had to be bright enough to catch the flowers into the photograph but not too much that the whole image just ended up being white. I just used sunlight for this shoot so the lighting couldn't affect the shoot in a negative way. Strengths of this shoot- This shoot was an easy one to complete and easy to not make it look like a bad, blurry picture. Limitations of this shoot- The shoots limitations would be that quite a few of the photos I took ended up not being clear enough and not being blurry enough. It was sometimes hard to capture enough of both these key parts in the images. |

|
Abstract Nature- Monochromatic Photography-


|
Monochromatic shoot-
The technique used for this shoot is that you remove the colour of the image to create it looking black and white which complements the pictures taken. For this shoot I went outside and took various images of plants with long leaves that you can see in the images above. For this shoot I only needed a camera and the plants. Majority of the pictures I took were close up photos of the plants and the lighting was just sunlight as the pictures were took outside. Strengths of this shoot- -Simple images to take and most of them turned out looking as they were expected to turn out. Limitations of this shoot- -It was a bit windy outside on the day that I did this shoot, so some of the images taken turned out too blurry to see what it is as too much movement was going on. |


|

I feel like this image was the most successful out of the monochromatic shoot. I have chosen this picture as one of my favourites because you can see all the little details and different shades on the leaf. Additionally, the background was already quite blurred however I edited it so the leaf was the centre and main focus of this image. For this photo, I edited this by using pixlr. I started doing this by going onto adjustments and changing the level around, therefore making it brighter and more visible as its been taken in black and white. I also went onto curves which changed the lighting on the image and made the background darker then the leaf brighter.

I chose this image as one of my favourites because the leading lines that the image has. You can see the the angle of the camera was at the top of the leaf, and clearly captured around 2 or 3 leaves. You can also see the patterns on the leaf in a darker colour. I edited this picture on pixlr by changing the lighting, to brighten up the leaves, so then you can see the pattern on the top. Next, I made it a warmer tone by going onto adjustments and slightly changing the colours. Lastly, I cropped the image so it was more centre.

I have chosen this photo as one of my favourites from the shoot because of the camera angle. I placed the camera at the top of the leaves which then made me able to take a picture with multiple leaves, which didn't end up blurry. This image stands out to me as a lot of light was still able to be let in, therefore you were able to see the texture and patterns of the leaves. I then went on to edit this picture by cropping it and making the background slightly darker, but the centre lighter.

I chose this image as one of my favourites because it is different to the rest of the ones taken of leaves. You can see a plant with a cobweb going across it, which I decided to take a picture of. When this image was taken, the cobweb wasn't as visible so to edit this. I adjusted the lighting so it was slightly darker so then you could see the cobweb. In this image you can see the use of pattern and texture created by the cobweb. Additionally, I cropped this image, so the plant was in the centre and the cobweb was in the background, but still visible.
Abstract Nature-Shallow depth of field-


|
Aperture Shallow Depth of Field-
The technique used for this shoot would be the change of settings in the camera. I set it to 1/4 for majority of these images to create a blurred background for them. I used a light which was placed above the flowers as you can see a slight shadow underneath them. These images are close up pictures of the flowers I used which have a blurred background, highlighting the flower. However, overall, I would say that this shoot went the worst out of the three as it was the trickiest to make the images not just look completely blurry as the camera settings needed to complete this shoot took a few seconds to take the picture, causing an unwanted shaking affect. Strengths of this shoot- -I would say the strengths of the shoot was that it was indoors meaning there was no disadvantages towards the image caused by the weather. Limitations of this shoot- -It was difficult to take pictures that showed the flower clear enough, and it was hard to hold the camera completely still while doing this. |


|

I feel like this image went the best out of the shallow depth of field shoot because of the range of different colours. You can clearly see the details inside of the white flower and the blurred background of other purple flowers which I also used for this shoot. I edited this image on pixlr by adjusting the levels to darken the background and then brightened up the centre flower. I made it centre by cropping it and then changed it to a warmer tone.
Artist Investigation / Edward Weston
“Photography to the amateur is recreation, to the professional it is work, and hard work too, no matter how pleasurable it my be.” – Edward Weston 
|
To begin my Abstract Nature Investigations I will initially study the work of Edward Weston because his work is eye-catching and abstract. He takes pictures of some vegetables such as peppers and they are all shot in black and white on a view camera.
Edward Weston was born in 1886 and was very well known for taking pictures of peppers which can be shown in the images below. I ended up choosing this quote because it sums up the work of Weston. It shows what he thought about photography and how passionate he was about it. This video is inspirational to me because it properly shows and explains the process behind Edward Weston's images and how he would have to set it all up to be able to capture the pictures the way he did. Below are a selection of 10 Weston images that are inspirational to me because they should many different of the 7 elements of art such as tone, line, form and texture but also shows some of the principles of photography like contrast, movement and symmetry. |


SEMI Analysis / Edward Weston


|
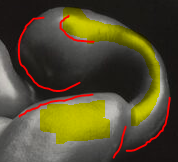
Subject-The photographer of this image is called Edward Weston. In 1930 he took this image and called it Pepper number 30. The title of this Photograph is called Pepper number 30 and was created in 1930. The genre of this photograph is still life, however some people also think that this image can be counted as abstract as well as being a portrait picture. The props used for this image would be the view camera which was used in Weston's shoots but also the pepper and the round surface that it was taken in. It would've needed lighting used from above and a steady stand for the camera to be placed on.
Element- The composition of the photo shows that the pepper had been placed centre of the image so therefore the rule of thirds had been used and the background is purely just the lighting, which can then catch the viewers eye. The perspective that Edward Weston has taken the photo from is at eye level. This perspective is effective because it can create a clear centre and main focus of the image. This also makes it possible for certain sections of the photo be lighter than others which is crucial when images are shot in black and white. The photographer employs a range of visual elements in his work. The most striking elements are tone and contrast. I would say that tone is especially demonstrated within Weston's work because of the use of black and white and being able to create shadows and light within his work. You can see tone incorporated into his work in the images on the left. Contrast is also therefore displayed into his work by the contrast of tones used (black and white) which could be the only colour shot on a view camera. Media- The photo has been taken from a short distance away so nothing will need to be cropped out of it. This is so the pepper can be the main focus of the image. The pepper has been placed in the middle of a funnel. By doing this the viewers eyes are lead towards the pepper and can see the use of leading lines within this image. The photo has been taken in a dark room with lighting placed above in the image. By doing this, it highlights certain parts of the pepper and creates shadows surrounding it which creates an atmosphere. To emulate this photo myself, I would get the following equipment: a pepper, a round bowl or funnel to place the pepper in, a dark room and a light placed above the pepper. I would change the settings on the camera to black and white and place it on a still surface to begin the shoot. Additionally, I would need to do further research and find out more about what camera settings I would need to use in order to make sure that the pictures are taken as similar as Edward Weston would've done. Intent- I feel that the photo conveys a message of calmness. It does this by the background not having anything in it and simply just different tones. This is relevant to the project/ theme as the image includes many parts of the elements or art and the principles of photography, Finally, a weakness of this project would be the difficulty of emulating Weston's work as we cannot use the same camera and equipment as he would've done. |

Technical Processes / Low Key Photography

|
Low key photography is where you take an image with a low exposure to light.
Instead of having a highly exposed image with lighting from above/ all around, low key photography usually has a black or dark background with a light source coming from the side of the object to create a shadow. Therefore when taking pictures with a low exposer, you will need a black background and one light placed in front of it. Additionally, your camera settings will be needed to be changed to a low ISO and a fast shutter speed. |
Shoot Plan / Edward Weston
|
Edward Weston is the inspiration behind this shoot which I therefore tried to emulate his photos in this shoot. I completed this shoot at school in the morning. This meant that lighting had to be considered, so then we opened the blinds to have behind the plant.
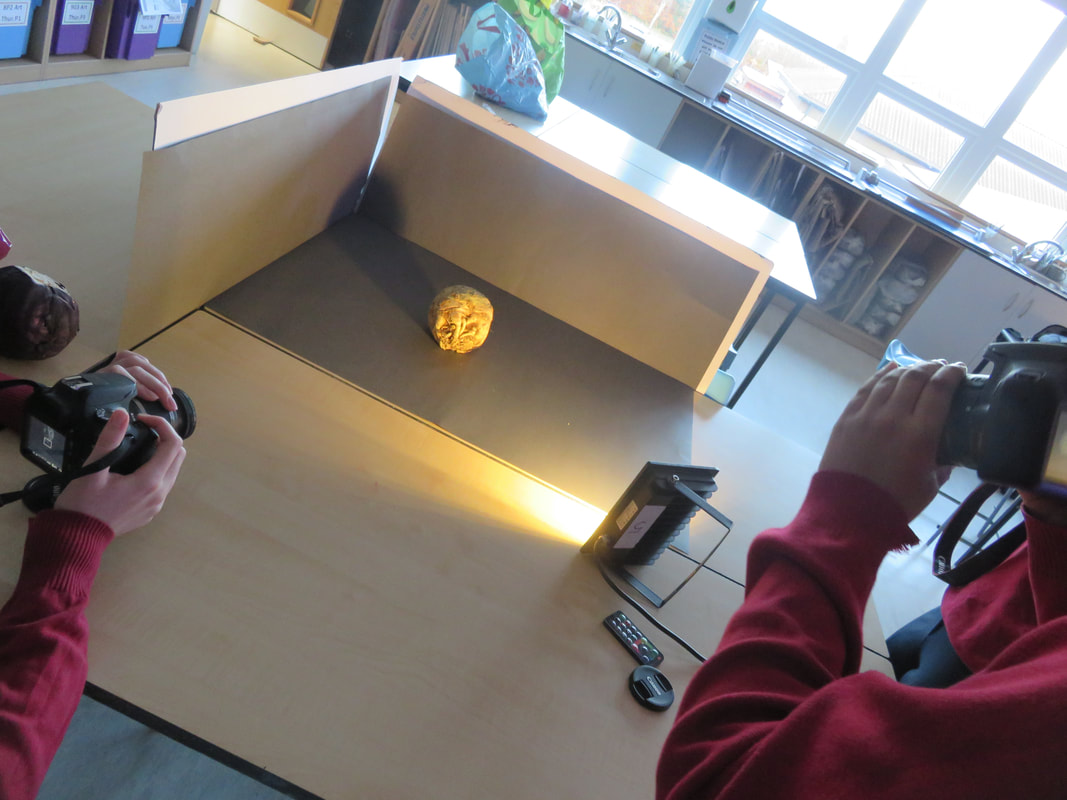
The props and equipment needed for this shoot was a variety of vegetables , a 4000d camera and a black or brown plant pot. This shoot was an example of low key photography, as the plant pot needed to be placed at an angle with the lighting creating shadows across the vegetable. For this shoot I used a cannon camera on manual mode in a monochromatic picture style. On the left, you can see a picture of the setup used to emulate Weston's work. Finally, I used a low ISO setting with an aperture of f/8. |
Contact Sheet / Edward Weston

Editing Process / Edward Weston


Edward Weston Shoot / Best Images

|
I chose this image as one of my best images from my Edward Weston shoot because you can see the textures of the broccoli and even though there is a lack of colours, you can still see the use of lines and tones throughout the image.
To edit this image, I cropped it using the rule of thirds, and altered the exposer, brightening the broccoli. Next, I adjusted the brightness and contrast of the image so the vegetable was brighter but not still leaving a dark background therefore, emulating Edward Weston's work. A weakness of this image is how the right has side of the broccoli goes slightly darker, resulting in you not being able to clearly see all of the textures in the image. To improve this I would brighten the right hand side of the image by using the lasso tool to select that certain part of this picture. |

|
I chose this image of one of my best from the Edward Weston shoot because it portrays a lot of the principals of photography. You can see the use of line, shape, tone, contrast and texture. To edit this image, I cropped it using the rule of thirds, and altered the exposer, brightening the pineapple. Next, I adjusted the brightness and contrast of the image so the fruit was brighter but not still leaving a dark background therefore, emulating Edward Weston's work.
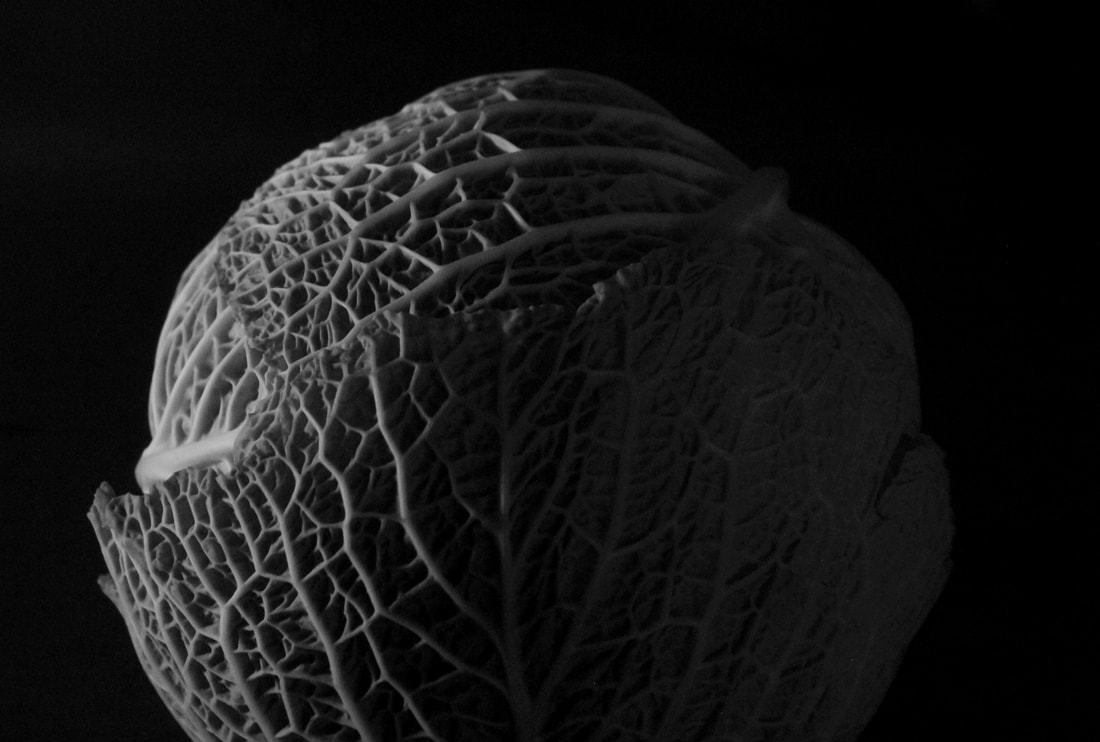
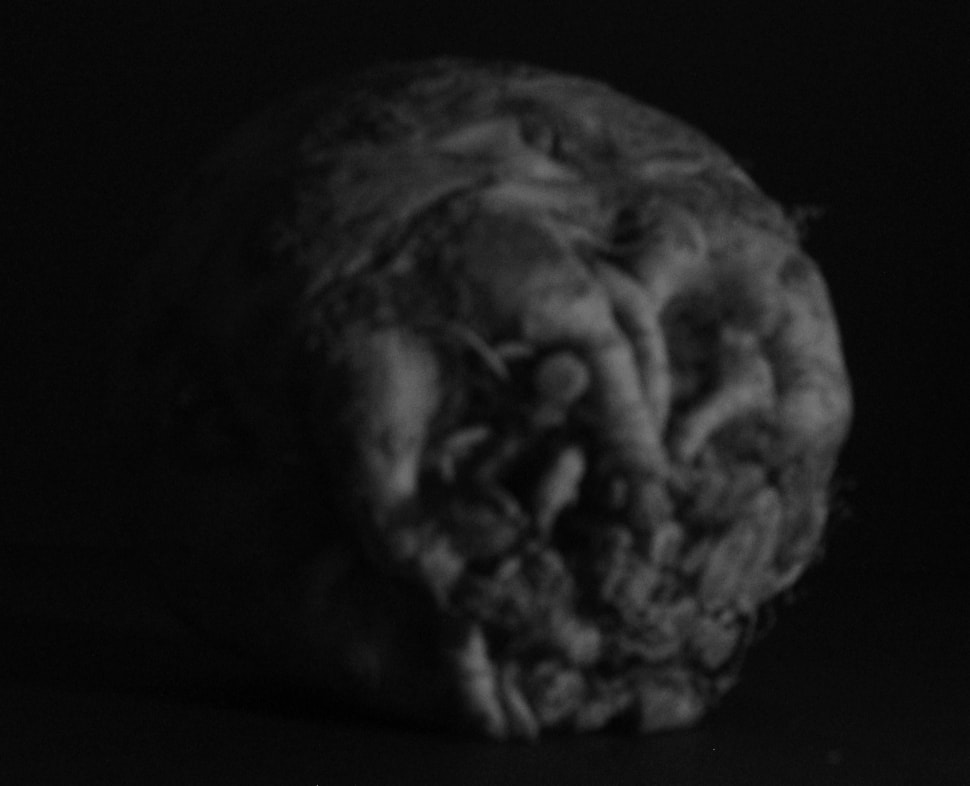
A weakness of this image would be the angle I took it at. To improve it I would have taken it at a different angle so it could capture more of the pineapple in the photo. I chose this image as my favourite because you can see all of the small and big details to the cabbage and all of the textures included in it. This is the best image I took and edited as it is right in the centre, has the use of lines, shape, tone, emphasis and most of all, textures. To edit this image, I cropped it using the rule of thirds, and altered the exposer, brightening the cabbage. Next, I adjusted the brightness and contrast of the image so the vegetable was brighter but not still leaving a dark background therefore, emulating Edward Weston's work. A weakness of this image would be how it going a light grey further to the right. To improve this I would use the lasso tool to brighten it up. Finally, I chose this image as one of my favourites because of the unusual shape and texture of this vegetable. I would say its an ugly vegetable however its an interesting shape and captures all sorts of shapes within it. To edit this image, I cropped it using the rule of thirds, and altered the exposer, brightening the vegetable. Next, I adjusted the brightness and contrast of the image so the vegetable was brighter but not still leaving a dark background therefore, emulating Edward Weston's work. A weakness of this image is that its slightly blurry. To improve this I would have placed the camera on a flat surface or a tripod to create a clearer image. |
Abstract through cyanotypes / Anna Atkins

Anna Atkins was a photographer and botanist in the 1800s. She would create cyanotypes which look like pictures but don't use a camera.
The advantages of using cyanotypes is that in the 1800s they couldn't use cameras so this was a good alternative to still create an image. It is also a fairly quick and easy process. Additionally, you don't need complicated equipment to carry this out and the results will likely turn out good as there are just a few, simple steps to follow.
However the disadvantages to creating cyanotypes is that there is a chance of them turning out to be pale and blurred which can make it hard to see what flower or plant you've added to it. Below are some examples of Anna Atkins work.


Below are some examples of Anna Atkins work which I did in school. I really enjoyed this technical process because it was interesting to do and turned out abstract but still has details from the plants.


Abstraction through Photograms / Man Ray
|
Man Ray was a photographer/ artist in the 1900s. He was from Philadelphia but spent most of his career in Paris.
The definition of photograms is a picture produced with photographic materials, such as light-sensitive paper, but without a camera. Advantages of photograms is that not too much equipment is needed like a darkroom. A disadvantage of photograms would be that they are abstract pictures which means they cant portray a set thing, making people not want to use it as much. Below are some examples of Man Rays work. |


Horst P. Horst / The unfamiliar and abstracted


Technical Processes / High Key
|
High key photography is a type of photography where you take an image with a bright, white background but without your image being over-exposed.
You can create these high key images by placing a light behind a background and place your flower in front of it. The background needs to be brighter than the flower placed in front so the image can therefore be exposed but not over-exposed. High key photography displays details of the flower by the bright background. They are colourful images, usually full of lines and patterns. |


Karl Blossfeldt - Artist Research:

“The plant never lapses into mere arid functionalism; it fashions and shapes according to logic and suitability, and with its primeval force compels everything to attain the highest artistic form.” |
Why this artist?
I chose this artist because his work is a good demonstration of high key photography. This therefore relates to the theme of abstract nature while also resembling the elements of art/ photography throughout his work. Who are they? Karl Blossfeldt was a German photographer during the 1900's. He was born in 1865 and died in 1932. He was best known for close up photographs of plants and pursued his career in Berlin. Why this video? I chose this video because it goes into depth about about how he created his work, and gives you a strong idea of how to emulate it. It also includes the purpose behind some of the images he took. |


Shoot Plan Diagram:

Karl Blossfeldt Shoot Plan: |

|
|
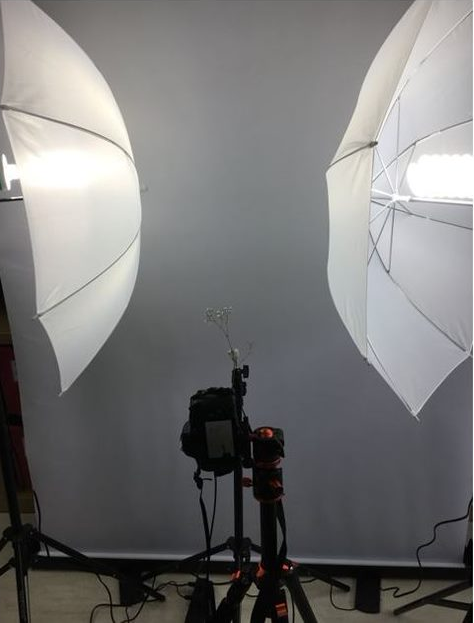
The inspiration behind his shoot was Karl Blossfeldt because I have been learning about the way he sets up and takes his pictures in order to emulate his work. I will do this shoot in a classroom so the lighting can be perfected. I will be doing three shoots in order to best emulate Karl Blossfeldts work. The props used will be natural forms such as seed heads and shells as these were the common natural forms used by Blossfeldt. To demonstrate the use of line, shape and form I will place a white backdrop behind the natural form in all of the shoots. This shoot will display high key photography by using a white back drop, soft boxes and natural ambient light. By using this equipment, I can full control the lighting throughout the shoot, creating a much better outcome. I will be using a school prime lens (50mm) and my own camera (cannon 4000d).
On the right are the pictures of the set up used to take the images emulating Karl Blossfeldts work. |
|


Karl Blossfeldt / SEMI Analysis:
|
Subject:
My chosen photographer is called Karl Blossfeldt. He was a photographer in the 1800s who created his images by the use of high key photography. The genre is portraiture with the following props used- a natural form, white backdrop, a light and a camera. To create his work Blossfeltd would have had the set of for high key photography which I have drawn above. Element- Karl Blossfeldt uses the 7 visual elements of art throughout all of his work but has been demonstrated very well within the image of the left. In my opinion the strongest elements within this piece of work would be line, tone, texture and form. These visual elements will be explained at the bottom. Media- The main focal point of this image is the leaves. They stand out to me because of the use of texture displayed in them. The natural form has been placed exactly in the middle. You can see the rule of thirds have been used so that the image is my eye-catching. I believe this photo has been taken inside a studio using a lamp because when doing high key photography you cannot only use sunlight as you need a light behind the white backdrop as well and one in front of the subject to minimalize shadows. Therefore I can see the light coming from in front preventing unwanted shadows. Intent- I feel this photo gives a message of peace and calm. This is because of the calm colours used as well as the stillness of the image creating a relaxing atmosphere. When I begin my own shoot in attempt to emulate Karl Blossfeldts work, I will try to portray a similar atmosphere of calmness by using a flat surface or a tripod to avoid shake and blurs in the image, and alter the setting to monochromatic to get the same colour pallet used by Blossfeldt. Shoot Plan- In order to best emulate Blossfeldts work I will use the set up I have drawn above. I will use a tripod or flat surface to place my camera on. In front of the camera I will place the natural form as well as the backdrop. I will place the subject directly in front of the camera to minimalize cropping down my images during the editing process and to include the rule of thirds throughout my work, to captivate the viewers eyes. The visual elements of art- Line- Line is a large portion within this picture as you can clearly see its already been included in the natural form but really highlighted as the white back drop adds a high level of detail to his work. Tone- Tone is embraced in this image because you can see the contrast between shades of white, black, and grey. It highlights certain parts of the plant, without creating an unwanted shadow. Texture- Texture is massively incorporated in this photo. The leaves on the subject are different tones, creating there to be so much texture all over the natural form. Form- Lastly I chose form because Karl Blossfeldt captured this image using many visual elements of art. This all made it looks 3d like the viewer of the picture could reach out and touch it. The image is captivating to look at, drawing eyes towards it to only see more and more elements of photography hidden within it. |


The rule of thirds is portrayed in all of Karl Blossfeldts work so I drew them on the show the symmetry of the image.
|
Editing Process / Karl Blossfeldt
To edit my Karl Blossfeldt images, I used PIXLR. I focused on cropping my images using the rule of thirds, brightening the background, and adjusting the levels on the subject. Below you can see the editing process on one of my best images.
1. Cropping the images using the rule of thirds.

2. Using the magic wand tool to select and edit the background.

3.Adjusting the levels of the image for the correct range of tones and contrast.

9 Best Images / Karl Blossfeldt


Final Outcome / Explosion Sketchbook

|
|
Artist Investigation / Dennis Wojtkiewicz

I use a Canon EOS 90D camera with a Canon EF 100mm f/2.8 Macro USM fixed lens. The only reason I even know about the technology is because my colleague told me that's what I needed and would be the biggest bang for the buck. The rest of it is all by feel. I have absolutely no photo training. For me that suffices because I'm not hung up on technical stuff. Just looking for ways to capture information for my paintings. |
Why this artist?
The final artist for the topic of abstract nature is Dennis Wojtkiewicz. This artist differs from the other artists because his pictures are paintings of the images he takes. However there are similarities because he uses high key photography within his images and a similar set up to other photographers to create a similar result. Who is he? Dennis Wojtkiewicz was born in Chicago in 1956. His website is http://www.wojtkiewiczart.com/work where you can find further information about his work. Why the quote? I chose this quote because it is an email response from Dennis explaining what kind of equipment he uses to create his images. This therefore helps me to best emulate his work as i know what photography techniques her would have used. Why this video? I chose this video because it best shows his work. The images shown demonstrate many elements of art and the principals of photography such as tone, texture, contrast, colour, harmony, balance and has a clear focal point. |


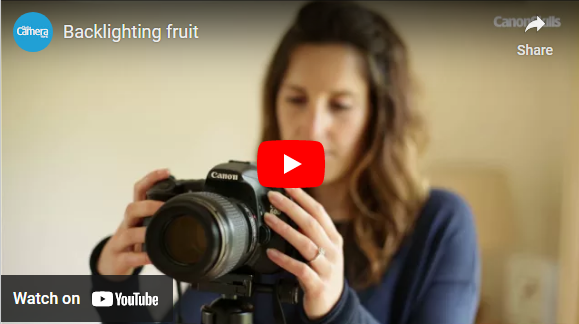
Photographic Techniques / Back Lighting Fruit
|
Backlighting photography is when you place a light behind the subject of the photo you are taking. Backlight photography emphasizes the depth behind the subject but can be difficult to get the exposer of the image right. To emulate his work you will need a bright light behind your choice of fruit. Your camera will need to be set to manual mode. Place your camera on a tripod to avoid any shakes to it and place in directly in front of the fruit so it is centre. Finally you zoom in or use your macro lens and make sure it is focused before taking the image.
|


|
Step 1:Cut the fruit up into thin slices to best show the details within the fruit from the light shining through.
|
Step 2: Put the fruit on a glass table with the light source placed underneath.
|
Step 3: Adjust the camera settings and place onto a tripod.
|
Step 3: Take the final image of fruit and edit it if you want to.
|
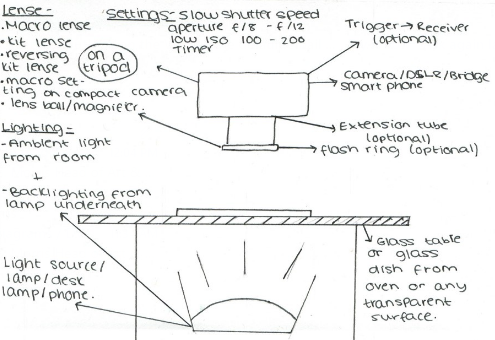
Shoot Plan / Dennis Wojtkiewicz:
|
The inspiration behind this shoot was Dennis Wojtkiewicz as I have been learning about the set up and equipment needed to complete shoots like Dennis did. I will attempt to emulate his photographic style (high key) by completing this shoot in a class room with natural lighting but with an additional lamp placed behind the subject of the image. I will be using a canon 4000d to take the images and it will be placed on a tripod or flat surface in order to avoid and shaking which would cause the final image to be blurry. Above the light will be a glass table or just anything clear for the subject of the image to be placed on to. Lastly, a macro lens will be used when completing this shoot to best capture the main focus while using high key photography.
On the right, you can see the set up we will be using throughout the shoot. |
|


Post Editing / Dennis Wojtkiewicz:

Editing step 1: In this picture, I used the adjustment tool to change the colours in the image slightly to amend th exposer of the image and brighten it up.
|

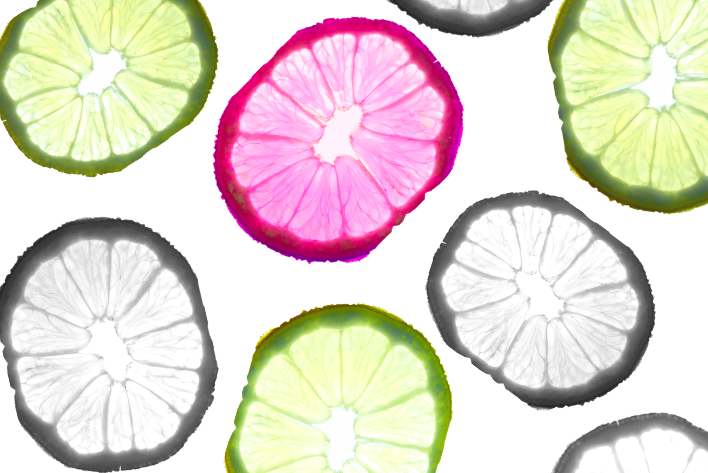
Editing step 2: In this image, I used the lasso tool to select the fruit and backgroiund in order to remove the background and then make it all white.
|
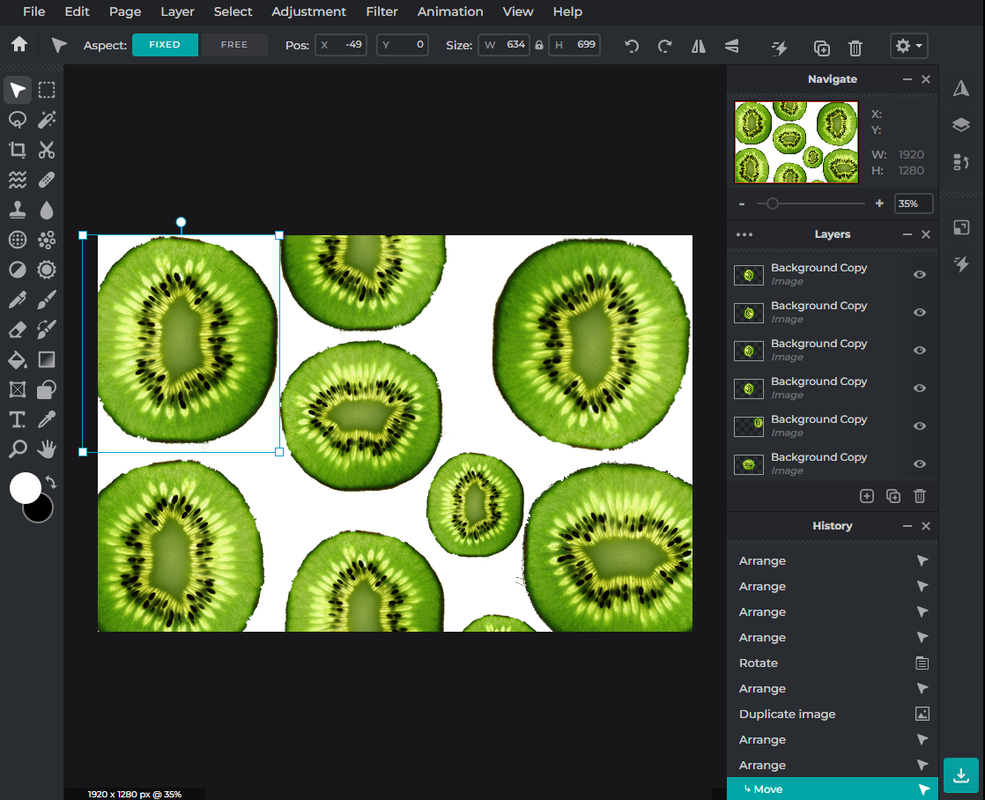
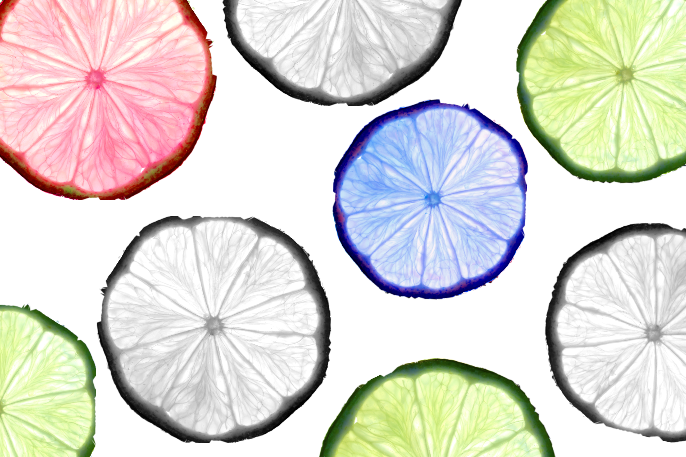
Editing step 3: I then duplicated the kiwi and rotated in around to add different angles of it to the image instead of it repeating itself.
|
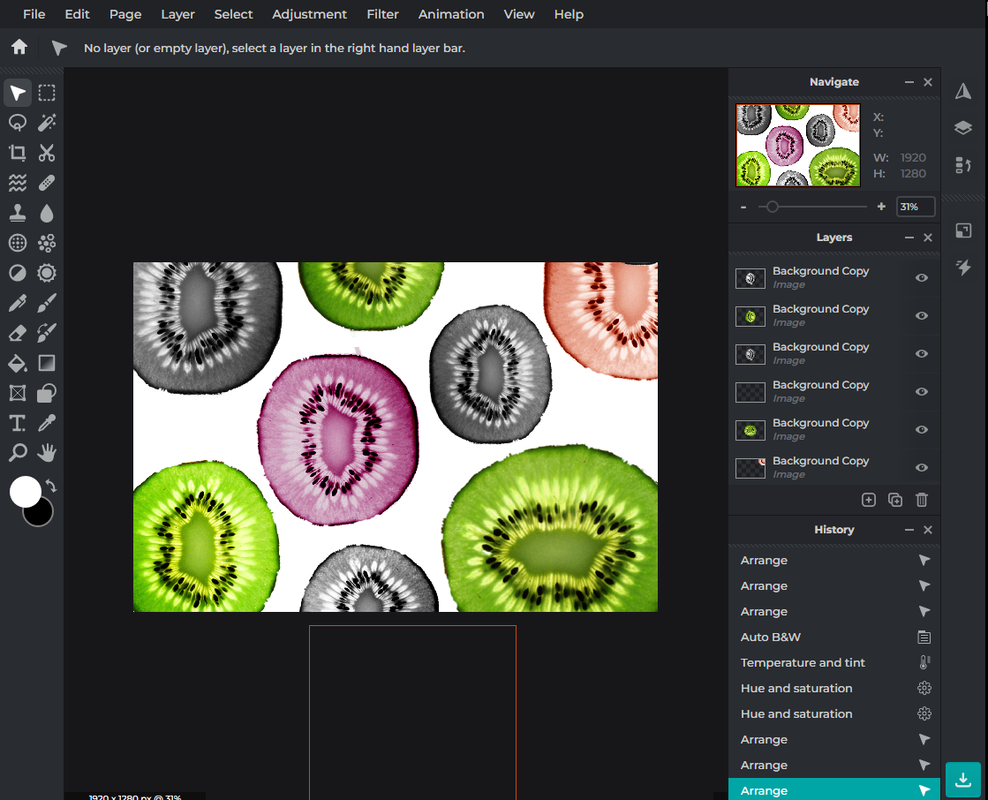
Editing step 4: In this picture I altered the temperature and tint/ the hue and saturation to create some of the fruits having a warm colour, and then used auto black and white and auto pop for the rest of them.
|
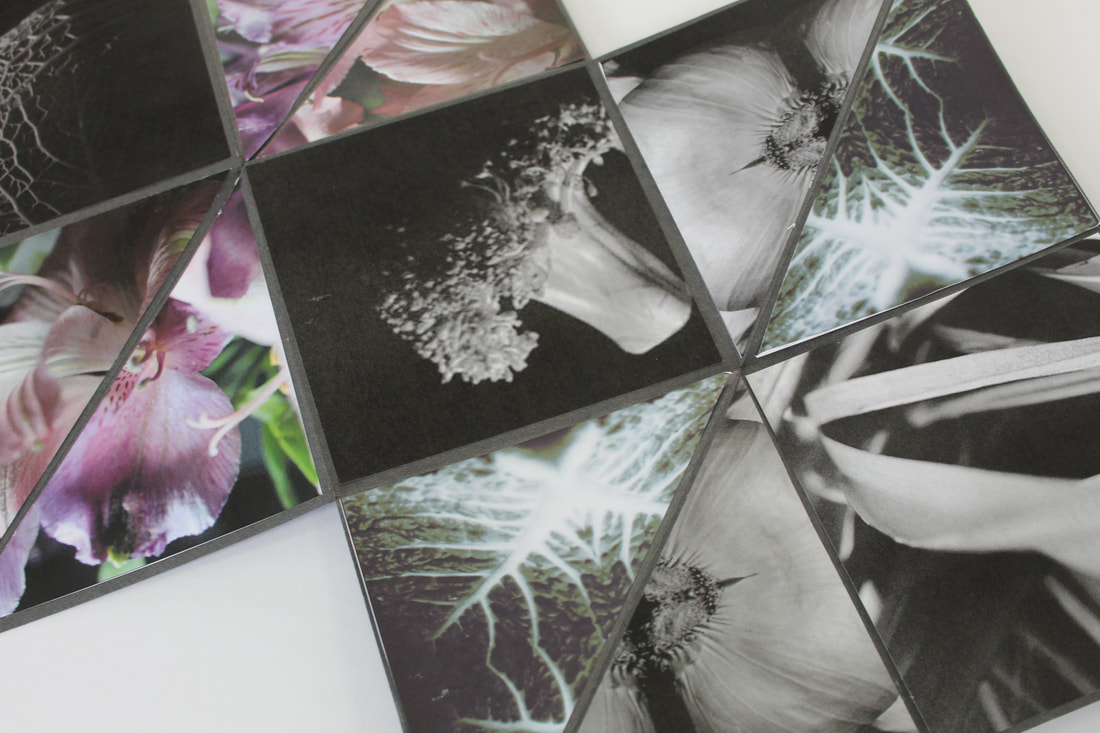
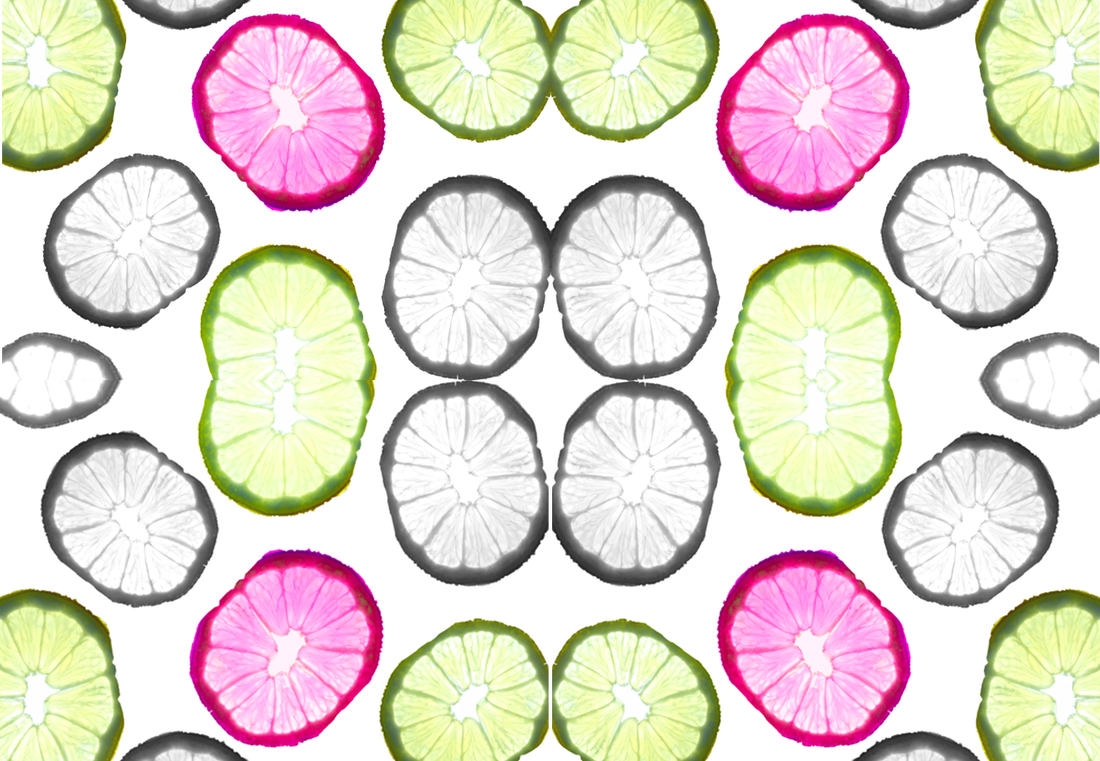
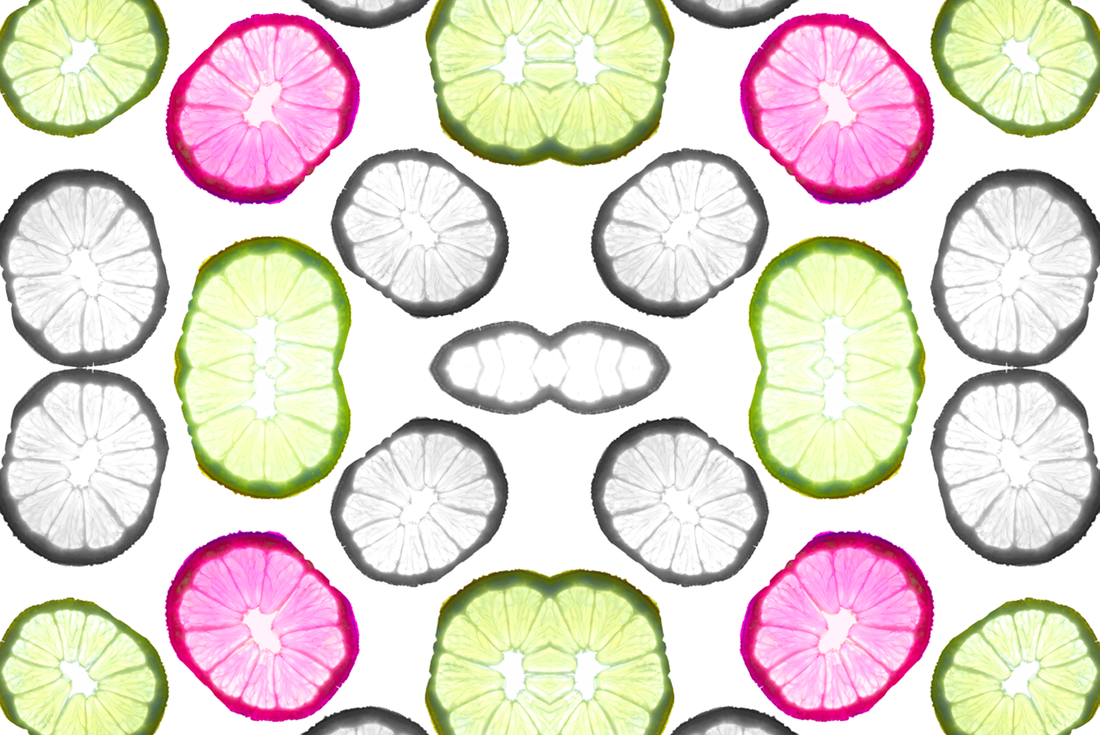
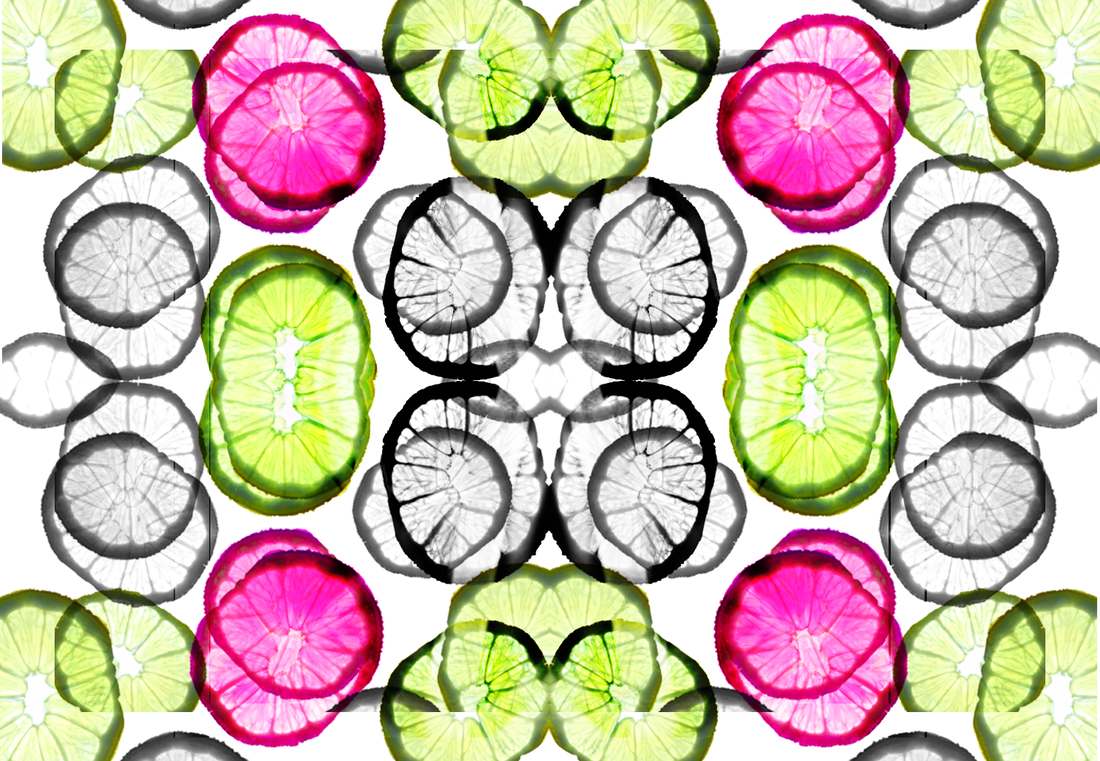
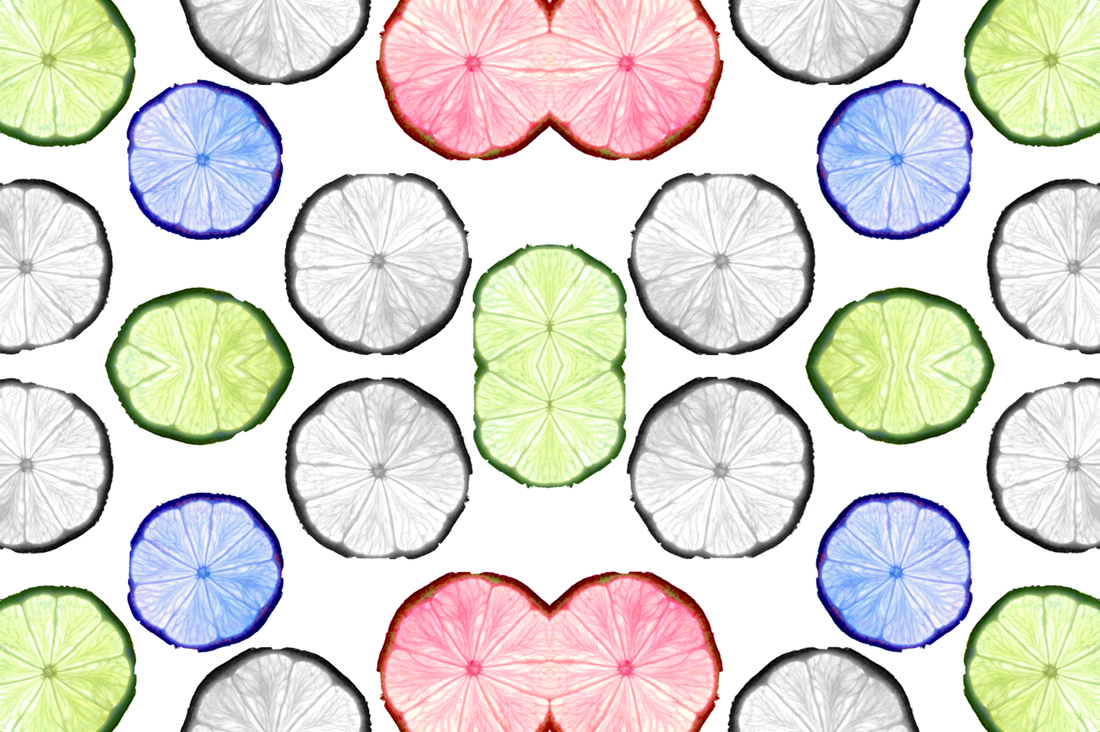
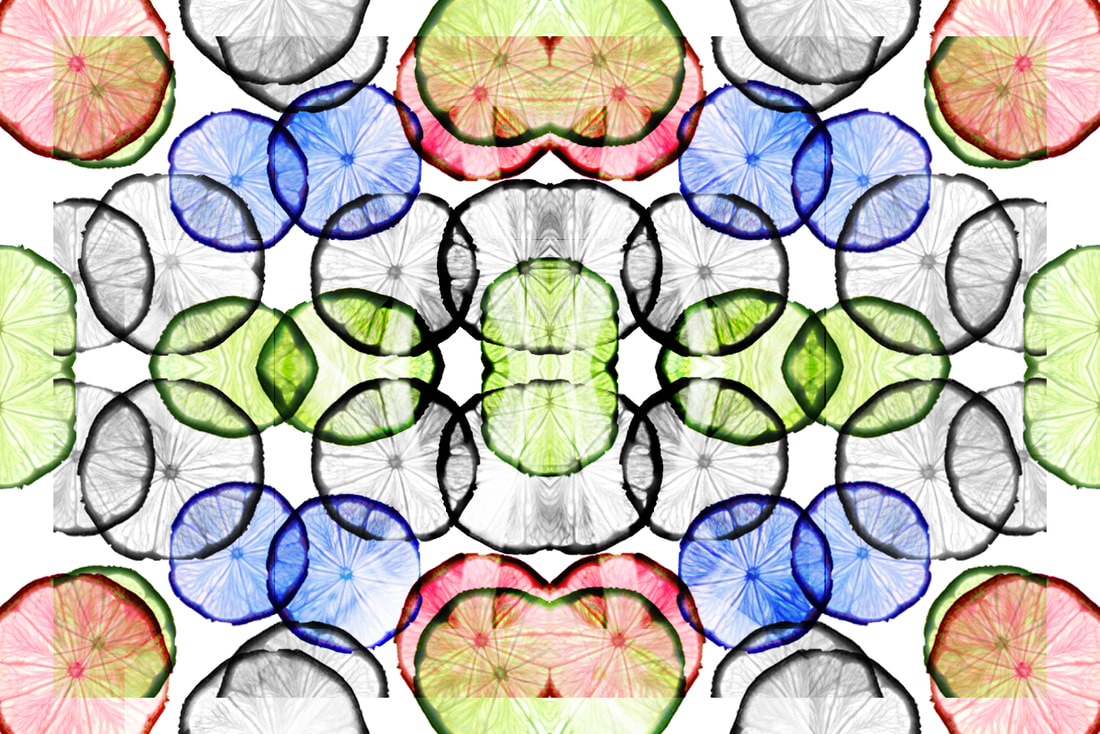
Rotational Designs / Dennis Wojtkiewicz:
Using pixlr and the work of Horst. P. Horst, I have edited my DW images into rotational designs using the abstract elements of form, tone, colour and shape.


|

|
|


|
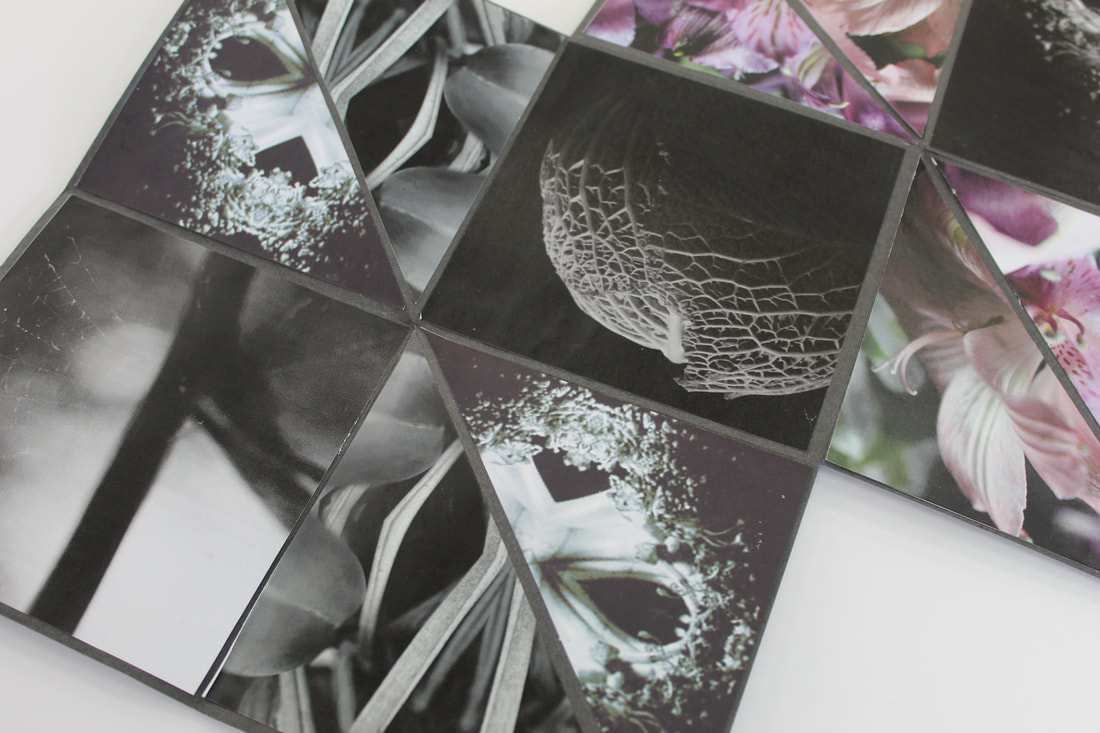
Abstract Nature / Hand Manipulation Sample Boards-


|

|
Abstract Nature Analysis-
Throughout this project, I have developed my understanding of abstract photography by exploring the theme of nature. Initially I researched the work of Edward Weston. Through studying this artist, I was able to explore concepts of line, tone, texture and shape. Inspired by his work, I created a series of emulations by setting it up to have a black back drop and a light placed in front of the vegetable and changed the camera settings to monochromatic to best emulate the types of cameras that Weston used to shoot his images. His work helped me understand the theme of abstract nature by as he always chose typically 'ugly' fruit adding an abstract affect to some of his images.
I also researched the work of Anna Atkins. Throughout studying this artist, I was able to explore the concepts of colour, tone, shape and line throughout emulating her work. I created a series of cyanotypes, emulating this by placing various different cuttings of plants onto fabric and following certain steps of doing things like putting it underneath a lamp to dunking it into water to create an image without the use of a camera. Her work helped me to understand this theme of abstract nature by learning the process of making an abstract image, specifically a cyanotype, without using a camera just like Atkins used to do.
The next artist I researched was Man Ray. When studying this artist, I was able the explore the process of creating photograms. Throughout studying this artist, I learned about the use of line, tone and contrast. Although I did not emulate his work, it still helped me to understand the topic of abstract nature as it is creating images using light-sensitive paper which results in an abstract image, which is similar to the work of Anna Atkins as it is without the use of a camera.
Another Artist I researched was Horst .P. Horst. This artist expanded my knowledge of the theme abstract nature because of the editing process of his images and the use of line throughout his images. The skill of rotating images was demonstrated throughout his work which took the original image of just a monochromatic fruit or vegetable to a whole new image by just flipping it around three other times to come out with something else which helped me understand a key concept of abstract nature photography.
An artist I researched was Karl Blossenfeldt. This was moving on from studying low-key photography to high-key photography which is the process of over-exposing your images and adding a lot of light in the shoot set up. Throughout studying this artist, I was able to explore the concepts of tone, colour, harmony and contrast. Being inspired by their work, I created a series of emulations by doing three separate shoots. One was an arial one, the other was one with a backdrop and the subject placed onto a tripod and the final shoot was one with the light source placed directly behind it. This artist and shoot both helped me to understand the abstract nature topic because the use of high-key photography portrayed the images in a different way causing them to appear abstract.
The final artist that I researched involving this theme of abstract nature was Dennis Wojtkiewicz. This artist expanded my knowledge of abstract nature as colour, tone, texture and line are specifically prominent throughout his work. This is done by a light source being placed under a clear surface and the subject being put over that. This links into the abstract nature theme because of the editing process that came after that which you can see above this evaluation.
I feel like the most successful shoot plan, shoot and editing process was the attempt to emulate the work of Edward Weston. This is because all of the images had good composition meaning that the subject was centre and symmetrical. Also although it is taken in monochromatic, the vegetables have a correct contrast compared with the black background. The editing process also went well because I managed to alter the exposer and light, enhancing the vegetables lines and details. The images from this shoot all only have one main focus, preventing the images from being overly cluttered. Lastly, this shoot was the most successful shoot because it was well researched before hand, many photos were taken so there can be a lot to choose from to narrow it down to the best 4, and then an editing process to adjust the exposer to improve the use of aperture and tones throughout the images.
The weaknesses of the abstract nature theme would be the intentional camera movement shoot. To improve this I would need to practise camera movement and alter the settings on it to come out with a visible but sort of shaky image. This could also be improved by placing the camera onto a tripod to move it in circular motions and to edit the images in a way to be less exposed to the light. Additionally on a few artist such as Man Ray, Anna Atkins and Horst . P. Horst the research could have been improved to better emulate their work. As well, I could have done the Dennis Wojtkiewicz shoot to create a contact sheet and more images to choose from when does the editing process as well as the MOCK exam. Finally, on the artists Man Ray, Anna Atkins, and Horst . P . Horst, I could have annotated the research, shoot plan, and shoot better as in comparasion to my analysis of Edward Weston and Dennis Wojtkiewicz, it is not explained in as much detail.
